Easter Sugar Cookies
Imagine hosting a spring gathering and serving a tray of beautifully decorated Easter sugar cookies. These cookies are not just tasty; they also add a festive touch to any celebration. You’ll learn how to make these delightful treats from scratch, including tips for shaping and decorating them. Whether you’re a beginner or an experienced baker, this recipe offers something for everyone. Let’s explore the details of creating these charming cookies together.
Why You’ll Love This Recipe
When you bake these Easter sugar cookies, you’ll quickly discover why this recipe stands out. It’s simple and requires just a few ingredients you probably already have at home.
The dough is easy to mix, and you won’t need any fancy equipment. You’ll love how the cookies turn out soft and chewy on the inside, with a delightful crisp on the edges.
Plus, you can customize them with colorful icing or sprinkles to match your Easter theme. The aroma of freshly baked cookies will fill your kitchen, making it feel festive.
This recipe also allows for fun cookie shapes, so you can let your creativity shine. Overall, it’s a straightforward and enjoyable way to celebrate the holiday.
History
The history of sugar cookies dates back to the early 1700s when they first appeared in the United States, particularly in the New England region.
These cookies were inspired by recipes brought over by European settlers who wanted to create sweet treats from simple ingredients.
As time went on, sugar cookies became popular for their versatility and ability to be shaped into various forms.
By the 19th century, they were often decorated for special occasions, including holidays like Christmas and Easter.
You might notice that their popularity has continued to grow, with many households creating their own traditions around baking and decorating sugar cookies.
Today, you can find countless recipes and designs, celebrating the rich history of this delightful treat.
Recipe
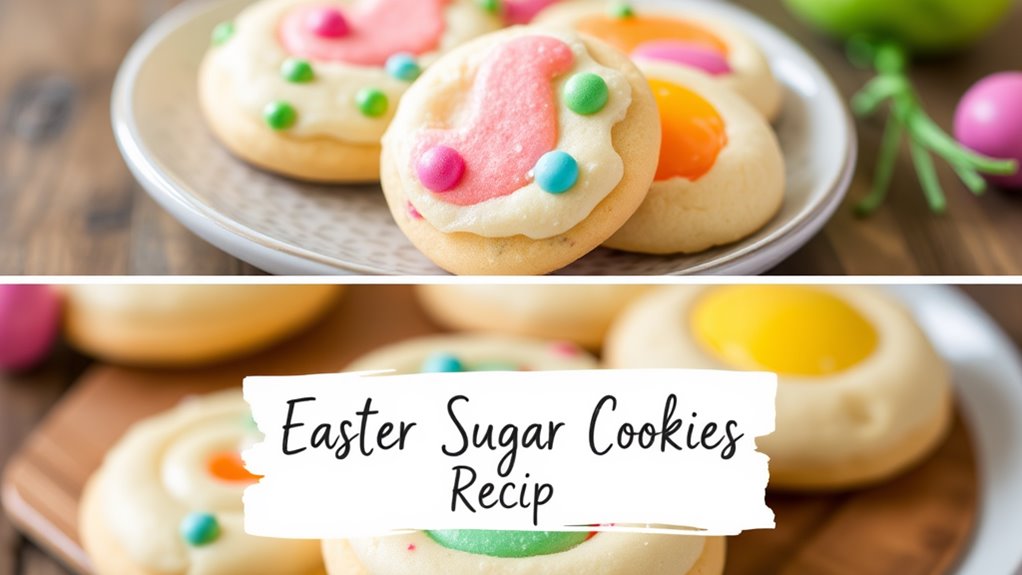
Easter sugar cookies are a delightful treat that bring a splash of color and sweetness to any holiday celebration. These cookies are soft, chewy, and can be decorated with vibrant icing and sprinkles, making them perfect for Easter gatherings, family parties, or simply to enjoy at home.
The beauty of sugar cookies lies in their versatility; they can be cut into various shapes like bunnies, eggs, or flowers, allowing for creativity in presentation.
To make the most out of your baking experience, it’s crucial to gather all the ingredients and have your workspace organized. The aroma of freshly baked cookies fills the kitchen, creating a warm and inviting atmosphere.
Once you’ve mastered the basic sugar cookie recipe, feel free to experiment with flavors and decorations to make them uniquely yours. Let’s explore the ingredients and steps to create these scrumptious Easter sugar cookies!
Ingredients:
– 2 ¾ cups all-purpose flour
– 1 teaspoon baking powder
– ½ teaspoon salt
– 1 cup unsalted butter, softened
– 1 ½ cups granulated sugar
– 1 large egg
– 1 teaspoon vanilla extract
– 1 teaspoon almond extract (optional)
– Icing and sprinkles for decoration
Instructions:
1. Preheat your oven to 350°F (175°C). Line baking sheets with parchment paper to prevent sticking.
2. In a medium bowl, whisk together the flour, baking powder, and salt. Set aside.
3. In a large mixing bowl, cream together the softened butter and granulated sugar until light and fluffy, about 3-5 minutes.
4. Beat in the egg, vanilla extract, and almond extract (if using) until well combined.
5. Gradually add the dry ingredients to the wet mixture, mixing until just combined. Be careful not to overmix.
6. Chill the dough in the refrigerator for at least 30 minutes to make it easier to handle.
7. Roll out the dough on a floured surface to about ¼ inch thick. Use cookie cutters to cut out your desired shapes.
8. Place the cookies on the prepared baking sheets, leaving space between each cookie to allow for spreading.
9. Bake in the preheated oven for 8-10 minutes, or until the edges are lightly golden. Remove from the oven and let cool on the baking sheets for a few minutes before transferring to wire racks to cool completely.
10. Once cooled, decorate your cookies with icing and sprinkles as desired.
For the best results when baking Easter sugar cookies, make sure to properly chill the dough before rolling it out. This helps maintain the shape of the cookies during baking and prevents them from spreading too much.
Additionally, experimenting with food coloring in your icing can add a fun twist to your decorations. Don’t hesitate to get creative with different shapes and designs to make your cookies festive for the Easter celebration!
Final Thoughts
Baking Easter sugar cookies can be a fun and rewarding experience. You get to create delicious treats while enjoying time with family or friends.
As you decorate your cookies, let your creativity shine through. Choose colorful icing, sprinkles, and shapes that celebrate the holiday, making each cookie unique.
Remember to follow the recipe closely, measuring ingredients accurately for the best results. Don’t forget to let your cookies cool completely before decorating, as this helps prevent the icing from melting.
Once finished, share your cookies with loved ones or package them as gifts. It’s a great way to spread joy during the Easter season.
With practice, you’ll refine your skills, and each batch will turn out even better than the last. Enjoy!
FAQ
Wondering what common questions people have about making sugar cookies for Easter? You might be curious about how to achieve the perfect texture.
Start with room temperature butter and don’t overmix your dough.
How long should you chill the dough? Chilling it for at least an hour helps prevent spreading.
If you’re wondering about icing, royal icing is a popular choice for decorating, as it dries firm and smooth.
How do you store your cookies? Keep them in an airtight container at room temperature for up to a week.
Finally, can you freeze them? Absolutely! Just make sure to layer them with parchment paper before sealing in a freezer bag.
Enjoy your cookie-making adventure!