Chocolate Nutella Cake Recipe
Did you know that nearly 80 million jars of Nutella are sold each year? This popular hazelnut spread can elevate your baking, especially in a Chocolate Nutella Cake. If you’re looking for a dessert that balances rich chocolate with creamy hazelnut goodness, this recipe is a must-try. Keep going to discover how to create this indulgent treat that’s sure to impress at any gathering.
Why You’ll Love This Recipe
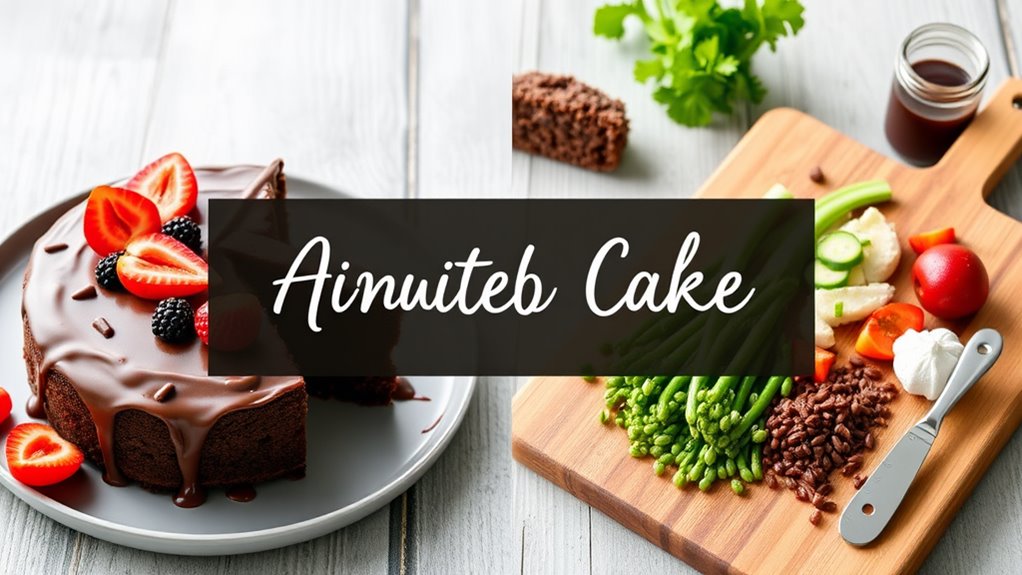
If you’ve ever craved a dessert that combines rich chocolate and creamy hazelnut goodness, this Chocolate Nutella Cake is perfect for you.
You’ll love how easy it’s to prepare, using simple ingredients you might already have at home. The cake’s moist texture and deep flavor come from the blend of cocoa powder and Nutella, making each bite delightful.
Plus, you can customize it with toppings like whipped cream or fresh berries for a touch of elegance. This recipe is great for any occasion, whether it’s a family gathering or a cozy night in.
You’ll impress your friends and family, and they’ll keep asking for seconds. Get ready to enjoy this delicious treat that’s sure to become a favorite!
History
The history of the Chocolate Nutella Cake is as rich as its flavor. This delightful dessert traces its roots back to the popular hazelnut cocoa spread, Nutella, created in the 1940s in Italy.
As people began to explore baking with Nutella, they discovered its creamy texture and unique taste made it an excellent ingredient for cakes. Over the years, bakers experimented, combining traditional chocolate cake recipes with Nutella.
This fusion led to an irresistible treat that quickly gained popularity worldwide. Today, you’ll find numerous variations, from simple recipes to extravagant versions topped with various garnishes.
Whether you’re celebrating a special occasion or just indulging, this cake represents a delightful blend of history and flavor that continues to evolve.
Recipe
Indulging in a rich and decadent Chocolate Nutella Cake is a delightful experience that combines the creamy goodness of Nutella with the deep, rich flavor of chocolate. This cake is perfect for any occasion, whether it’s a birthday, anniversary, or simply a treat for yourself.
Its moist texture and luscious frosting make it a showstopper that will impress your family and friends. With just a few simple ingredients and steps, you can create a dessert that’s sure to satisfy any chocolate lover’s cravings.
To get started on your Chocolate Nutella Cake, gather your ingredients and prepare your baking tools. A round cake pan, mixing bowls, and an electric mixer will be your best friends in this delicious endeavor.
The combination of chocolate cake layers and Nutella frosting will create a beautiful and delicious dessert that looks as good as it tastes. Let’s plunge into the recipe and bring this chocolate dream to life!
Ingredients:
- 1 ¾ cups all-purpose flour
- 1 ¾ cups granulated sugar
- ¾ cup unsweetened cocoa powder
- 1 ½ teaspoons baking powder
- 1 ½ teaspoons baking soda
- 1 teaspoon salt
- 2 large eggs
- 1 cup whole milk
- ½ cup vegetable oil
- 2 teaspoons vanilla extract
- 1 cup boiling water
- 1 cup Nutella, for frosting
- 1 cup heavy cream, for frosting
Instructions:
- Preheat your oven to 350°F (175°C). Grease and flour two 9-inch round cake pans and set aside.
- In a large mixing bowl, sift together the flour, sugar, cocoa powder, baking powder, baking soda, and salt. Mix until well combined.
- Add the eggs, milk, vegetable oil, and vanilla extract to the dry ingredients. Beat on medium speed for about 2 minutes until the batter is smooth.
- Carefully stir in the boiling water. The batter will be thin, but this helps create a moist cake.
- Pour the batter evenly into the prepared cake pans. Bake in the preheated oven for 30-35 minutes, or until a toothpick inserted in the center comes out clean.
- Allow the cakes to cool in the pans for 10 minutes, then remove from pans and transfer to wire racks to cool completely.
- While the cakes are cooling, prepare the frosting. In a mixing bowl, whip the heavy cream until stiff peaks form. Gently fold in the Nutella until fully combined.
- Once the cakes have cooled, place one layer on a serving plate, spread a generous amount of Nutella frosting on top, then place the second layer on top. Frost the top and sides of the cake with the remaining Nutella frosting.
For best results, let your Chocolate Nutella Cake sit at room temperature for about 30 minutes before serving, as this allows the flavors to meld together beautifully.
Also, consider garnishing the cake with chocolate shavings or chopped hazelnuts for an extra touch of elegance. If you have any leftovers, store them in an airtight container at room temperature for up to three days, or refrigerate for longer freshness. Enjoy your delicious creation!
Final Thoughts
While baking a Chocolate Nutella Cake is an enjoyable journey, the real reward comes when you serve it to friends and family.
This cake, with its rich flavors and moist texture, is sure to impress everyone at your gathering.
Don’t forget to let the cake cool completely before adding the frosting; this step prevents melting and guarantees a beautiful presentation.
You can also personalize your cake by adding toppings like chopped hazelnuts or fresh fruit.
Remember, presentation matters, so take your time arranging the decorations. Enjoy the compliments as you slice into your masterpiece.
Finally, don’t hesitate to share your baking experience and tips with others, as every bake can inspire someone to create their own delicious treats.
FAQ
Wondering what questions might come up while making a Chocolate Nutella Cake? First, can you substitute ingredients? Yes, you can use almond flour instead of all-purpose flour for a gluten-free option, or swap Nutella with another chocolate spread if needed.
Next, how do you store leftovers? Keep the cake in an airtight container at room temperature for up to three days or in the fridge for about a week.
What if the cake sinks in the middle? This could happen if it’s undercooked, so always check with a toothpick before removing it from the oven.
Finally, can you freeze it? Absolutely! Wrap slices tightly in plastic wrap, then place them in a freezer bag for up to three months.
Enjoy your baking!